Here’s a way to play Pokemon GO from the comfort and safety of your home. All you need is a Windows computer, a bit of patience, and this guide.
Warning: To play Pokemon GO on your home PC, i.e., without physically moving around, you need to engage a method called GPS spoofing. Strictly speaking, this is a violation of the developer’s Terms of Service and could get you temporarily or permanently banned from the game. Use at your own risk!
What You Need
To set up Pokemon GO on Windows using BlueStacks, you need to set up a bunch of tools in exactly the right order.
Update: One of the apps needed to make this method work is (now?) a paid app. We have added a free alternative using the Nox App Player at the bottom of this article
If you’d still like to try the BlueStacks route, go ahead and download all the tools listed below. For everything but BlueStacks — the Android emulator for Windows that we’ll use to install the game –, download the Android APK file.
- A Windows PC and admin rights to install software.
- BlueStacks; use this BlueStacks version for Windows 7/8 or when the game crashes with the Windows 10 version.
- KingRoot, a root tool for Android devices.
READ ALSO: 7 Best Android Root Software with or without Computer
- Lucky Patcher, a tool to modify app permissions.
- Fake GPS Pro, an app to spoof your location. Unfortunately, the pro version is (now?) $5 on the Google Play store. You can still find the APK file for free, but download at your own risk.
- Pokemon GO, the game itself. Don’t install or run until it’s time or it won’t work.
We recommend that you put all these files into a single folder, so you can easily find them later. Don’t rush to install any of the apps without knowing what to do! If you carefully follow the order and instructions below, you’ll be playing Pokemon GO much sooner.
Disclaimer: This article is based on the YouTube tutorial by Travis D, with some adjustments for clarity and simplicity.
How to Set It All Up
1. Install BlueStacks
First, install BlueStacks.

You should also set up your Google account. If you do that now, you’ll be able to connect to the game quicker later on.
2. Install and Run KingRoot
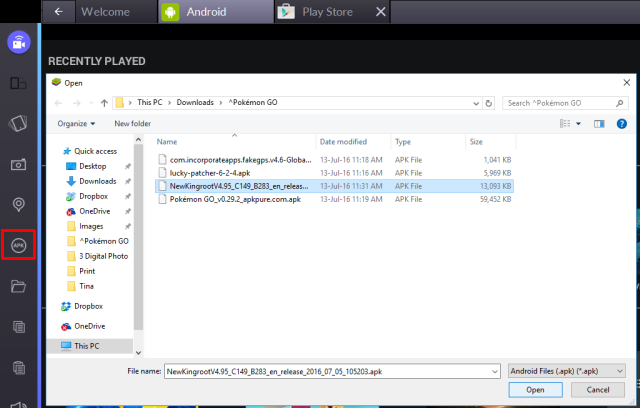
To install KingRoot, open BlueStacks, click the APK symbol on the left, open the respective APK file on your computer, and KingRoot will install automatically.


Once installed, run KingRoot, scroll to the bottom, click Try it, then click Fix now.


When you see your Security Index, click Optimize now, then close KingRoot. We won’t need this app again.
3. Restart BlueStacks
Click the cogwheel in the top-right corner of BlueStacks and select Restart Android Plugin.


This will restart your BlueStacks app player. Remember this routine, because you’ll need it again later.
4. Copy Files From Windows
Click the folder icon in the BlueStacks sidebar on the left and open FakeGPS. You don’t actually have to complete the action with any app; it should be copied to BlueStacks automatically. You can close the selection window by clicking a random spot in the background.
5. Install and Run Lucky Patcher
The install process works the same as for KingRoot. Just click APK on the lefthand side of the BlueStacks window, select the APK file on your computer, and it will install. When you open Lucky Patcher for the first time, click Allow to grant the app access.
Now, inside Lucky Patcher, go to Rebuild & install in the bottom right, then head to sdcard > Windows > BstSharedFolder. Here, select the APK file for FakeGPS and Install as a System App. Confirm with Yes to install.


You need to reboot BlueStacks to apply those changes. You can hit Yes or use Restart Android Plugin, as described under step #3.
6. Install Pokemon GO
As for KingRoot and Lucky Patcher before, just install the APK file you downloaded previously. Don’t launch the app at this point because it won’t work yet.
7. Check Your Location Settings
In BlueStacks, click the cogwheel in the top right, select Settings, go to Location, and make sure the Mode is set to High accuracy.
Any Windows GPS service needs to be disabled, because it can mess with BlueStacks. In Windows 10, press Windows key + I to access the Settings app, then head to Privacy > Location and make sure the Location for this device is set to Off.


In other versions of Windows, open the Start Menu, search for location, and ensure the feature, if available, is disabled.
8. Set Up FakeGPS
Head back to Lucky Patcher and you might see FakeGPS in the list of apps. If not, don’t worry.


To see FakeGPS, go to Search at the bottom, then select Filters in the top right, check System Apps, and click Apply.
Click FakeGPS from the list and select Launch App. A How to operate window will pop up that explains how to use it. Read the instructions carefully and click OK to close the window.


Click the three dotted button in the top right, go to Settings, check Expert Mode, read the warning message, and confirm with OK.


Click the back arrow in the top left to get back to the map. Now select your preferred location, either somewhere close to your real location or your favorite and, ideally, highly populated place on the planet. For me that would be downtown Vancouver.


Click the entry and select Save to add that location to your favorites. Click the organge Play button in the bottom right to engage the fake location.
9. Play Pokemon GO
Finally, we’re ready to play the game! If the Pokemon GO app takes a while to launch, that’s okay. You’ll set Pokemon GO up exactly like you would on a regular Android or iOS device. You can log in with Google and the app will automatically load your previously set up Pokemon GO account, should you have attached one to your Google account.
When the game finally launches, you should find yourself in the fake location you engaged earlier. If the game doesn’t immediately detect your location, go back to FakeGPS (inside Lucky Launcher), pick a spot on the map, and engage a fake location again. We had to restart BlueStacks (see step #3) and fake a location we had actually visited in real life.
Every time you want to move to a different spot, you have to go back to FakeGPS and engage a new fake location. That’s why it’s handy to set a few favorites, which will help you to go back and forth between Poke Stops, for example. Avoid long-distance map jumps, as this can reveal GPS spoofing.


Note that you don’t have to turn off your camera. When the first Pokemon is detected and your camera doesn’t work, the app will ask you whether you want to turn off AR mode (AR = augmented reality). Just confirm with Yes and you can catch the Pokemon in the virtual environment.
If you have a touch screen, you can use it to interact with the app and throw your Poke Balls.
Troubleshooting Tips
Setting up this game in BlueStacks isn’t easy and you can easily miss a couple of things along the way. Here are some tips in case the game fails to detect GPS or your location
- In Windows, make sure the Location for this device is Off.
- In FakeGPS, double-check that Expert Mode is enabled.
- In BlueStacks’ location settings, confirm that Google Location History is Off and Mode is set to High accuracy.
- Launch FakeGPS and engage a new fake location.
- Use a location you have visited in reality on your Android or iOS device.
- Restart BlueStacks and try again.
Alternative Solution: Nox App Player
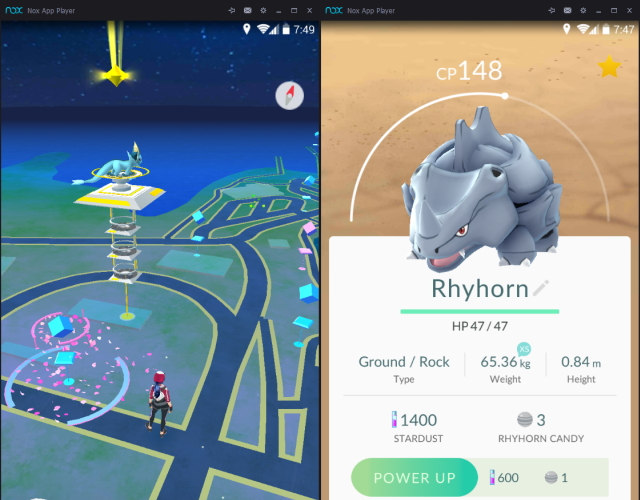
An easier way to play Pokemon GO on Windows is using the Nox App Player. This emulator even comes with Pokemon GO pre-installed and you can navigate inside the game using your keyboard. Another welcome feature is that the emulator window automatically minimizes to the dimensions of the game.


For us, this emulator was generally slower than BlueStacks, both when starting up and inside the game, which made it harder to catch Pokemons. Moreover, we couldn’t get the location switching feature to work. Overall, however, it’s a smoother experience.
If you also see a white map and can’t leave the default location (Sydney, NSW), close Nox App Player and manually add your preferred coordinates (right click a spot on Google Maps > What’s here?) under C:\\Users\<username>\AppData\Local\Nox\conf.ini. Fortunately, you don’t have to switch your location a lot because you can walk around using keyboard navigation.
Pokemon Ready, Set, GO!
Credits: https://www.makeuseof.com/tag/play-pokemon-go-windows-pc/

2 comments
Thank you for sharing this. It was helpful. Keep sharing such things.
You’re welcome